Showing posts with label Kid Friendly. Show all posts

Monday, December 5, 2016

Dark Chocolate and Peppermint Shortbread Fingers

Two Christmases ago, my husband's entire family came to visit from the Midwest.  My mother- and father-in-law arrived Christmas Eve, and my sister-in-law and her family arrived late Christmas evening.  Rather than a big family meal just as everyone was arriving, I opted to serve soup and salad for supper with a big plate of Christmas cookies for dessert.  I always make sugar cookies at Christmas, along with another secret family favorite, but I wanted a third type of cookie on my platter.  Something with chocolate, to round out the flavors I already had going on.  And something simple since cooking (and planning) for so many people was bound to make my head spin.  I channeled my inner Sandra Lee and opted for semi-homemade!  I'm not sure how I came up with this combination, but it was a real winner and something I'll make again and again!

1 package Walkers shortbread fingers
12 ounces dark chocolate
peppermint sprinkles, or finely chopped candy canes

Heat a small sauce pan of water to simmering.  Place a shallow bowl over the pan, ensuring that the bowl is not submerged in the water.  Melt the chocolate, stirring constantly until smooth.

Working quickly, dip the shortbread into the chocolate so that half is covered.  Allow excess to drip off.  Place the shortbread on a wire rack placed inside a baking sheet, and sprinkle with peppermint before the chocolate cools and hardens.

Allow to cool completely before serving.

Monday, April 11, 2016

Chicken Pasta Caprese

I love just about any type of pasta salad.  And I also love Caprese salads.  So when I saw this recipe, I just knew I had to try it!  And it didn't disappoint, of course!  In fact, my husband even raved about this recipe, which wasn't totally shocking, but I was a little surprised he liked it that much.  When dinner was over, I added some balsamic vinegar, pine nuts, and crushed red pepper and turned this into a cold pasta salad to take for lunch at the hospital, where heating time eats too far in to the five minutes I might have to wolf down my lunch between rounding on patients!  Either way you serve it, this pasta is a crowd pleaser and travels easily, making it perfect for a Spring Potluck or picnic in the park!

1 pound boneless, skinless chicken breast, cut into bite-sized bits
1/2 teaspoon dried basil
salt
pepper
cooking spray or oil mister
9 ounces pasta (gemelli is pictured, but any will do)
4 teaspoons olive oil
6 cloves garlic, chopped
2 1/2 cups halved grape tomatoes
1/4 cup thinly sliced fresh basil
4 ounces part skim mozzarella cheese, cut into cubes, or buy the smaller pearls (bocconcini)

Heat a large nonstick skillet over high heat.  Season the chicken with dried basil, 1/4 teaspoon salt, and pepper to taste.  Spray the skillet with oil and add chicken.  Cook until cooked through, then transfer to a plate.

Cook the pasta to al dente.  Drain, reserving about 1/2 cup of the pasta water.

Meanwhile, increase the heat until the skillet to high.  Add the olive oil and garlic, stirring until golden, about 1 minute.  Be careful not to burn the garlic.  Add the tomatoes, 1/8 teaspoon salt, and pepper to taste.  Reduce heat to medium-low and cook until tomatoes become tender, about 5 minutes.

Add the pasta to the tomatoes.  If pasta seems dry, add some of the reserved pasta water.  Add chicken and toss well.  Remove the pan from heat and stir in the fresh basil and cheese.  Serve hot.

Serves 5.

Recipe adapted from The Skinnytaste Cookbook, by Gina Homolka.

Monday, March 14, 2016

Corn Dogs

My youngest son is the Hot Dog King.  And since his third birthday was Saturday, he got his choice for dinner.  Corn Dogs were on the menu, but rather than buying the frozen variety, I opted to make some from scratch!  These turned out much better than expected, and while a little time consuming in my countertop fryer, they were worth it as a special occasion.  After a fun day riding the Metro and visiting the Zoo, my little birthday boy was ready to chow down on corn dogs, macaroni and cheese, and applesauce!  Not bad menu planning for a three year-old!!

2 2/3 cups yellow cornmeal
1 1/3 cups flour, plus more for rolling
3 tablespoons sugar
2 teaspoons baking powder
salt and pepper
4 eggs, beaten
1 1/2 cups milk
vegetable or peanut oil, for frying
12 hot dogs
ketchup and mustard, for serving

Whisk together cornmeal, flour, sugar, baking powder, 1 teaspoon salt, and 1 teaspoon pepper.  Stir in eggs and milk (this will be about 5 cups batter).  Fill a large pot or deep fryer with enough oil to submerge hotdogs and heat to 360 degrees.

While oil is heating, pat hot dogs dry and insert a 10-inch wooden skewer through each.  Roll in flour to coat.  Dip a hotdog into the batter, turning until completely coated.  I've found that the easiest way is to pour some of the batter into a tall water glass, then, using the skewers, dip each hot dog.  Holding it by the skewer, carefully add each hot dog to the hot oil.  Repeat with remaining hot dogs.

Cook corn dogs, turning with tongs to cook evenly, until deep golden brown, 5-7 minutes for each.  Transfer to a paper towel-lined platter, turning to blot oil.  Serve warm, with ketchup and mustard.

Serves 12.

Recipe adapted from Martha's American Food, by Martha Stewart.

Monday, February 29, 2016

Creamy Broccoli Cheddar Soup

Just after New Year's, my husband, kids, and I piled into the car for a trip to the Midwest to celebrate a late Christmas with my in-laws.  Since we were arriving late in the evening, my mother-in-law planned a simple supper of soup and warm bread, which was perfect on a cold evening!  I asked her for the recipe, and a few weeks ago, when my own mama was visiting, I planned a similar meal.  Mom and I made a few changes to the original recipe, added a crisp green salad, and served Chocolate Fondue for dessert.  It was, once again, a "simple" meal, but one that warmed a body right up on a cold winter night!  My kids loved the soup, opting to sip it from a cup "like a broccoli smoothy, Mommy!" and dip the bread as well.

1/2 cup plus 2 tablespoons butter
1 medium onion, chopped
4 cloves garlic, minced
1/2 cup flour
4 cups milk
4 cups chicken stock
4 cups frozen broccoli florets, roughly chopped
2 cups shredded carrots
2 cups shredded sharp cheddar cheese
1/2 teaspoon ground nutmeg
1/2 teaspoon cayenne, plus more or less to taste
salt & pepper to taste

Melt 2 tablespoons butter in a large soup pot over medium-high heat until melted.  Add onion and garlic and saute until soft and fragrant.  Remove from pot and set aside.  

Reduce heat to medium and melt remaining 1/2 cup butter, then add flour, whisking constantly.  Add milk and chicken stock and stir to combine.  Add broccoli, carrots and onions.  

Reduce heat to low and simmer 20-25 minutes, or until vegetables are softened.  Add cheese and remaining seasonings.  Simmer, stirring occasionally, until soup has thickened.  With an immersion blender, puree soup until it is almost completely smooth.  Adjust flavor according to taste.

Serve with warm crusty bread.

Serves 6-8.


Monday, February 8, 2016

Dark Chocolate-Raspberry Fondue

When I was little, we used to make "dipping desserts" quite often.  My brother and I loved using long wooden skewers or toothpicks to dip fresh fruit into warm, gooey, melted chocolate.  As an older child, I learned that what I thought was a fun treat invented by my mother was really a classic chocolate fondue.  It remained a favorite dessert for me, and in college I was excited to learn that a fabulous fondue restaurant was close-by.  It was a dinner request I'd make when my parents were in town, when a boyfriend took me out for my birthday, or just because a group of us wanted to do something different!  Several years later, my (now) husband took me to Melting Pot to celebrate our first Valentine's Day together, and in commemoration, my mother-in-law would later give me a fondue set for Christmas.  Now I have two small children, who find that dipping fruit into melted chocolate is great fun, and a cure for an upset tummy!  Who'd have thought?!

12 ounces dark melting chocolate
1/4 cup milk
3 tablespoons Chambord (raspberry liquor)
Fruit, pound cake, marshmallows, etc. (for dipping)

Heat a small saucepan of water over medium-low heat to a simmer.  Place another mixing bowl (metal or glass) over the pan to form a double broiler.  The bowl on top should not be touching the simmering water.  Combine the melting chocolate and milk in the double broiler and stir continuously until completely melted and smooth.  Stir in the Chambord.

Transfer melted chocolate mixture to fondue pot.  Serve immediately with fresh fruits, marshmallows, pound cake, graham crackers, or other favorite "dippers"!


Monday, February 1, 2016

Caramelized Onion Dip

The big game is coming up this weekend and I don't know about you, but football food is a must whether you're just watching for the commercials or you're a die-hard fan.  Last year I featured a few menu ideas here and here and I also have several game day favorites here so you can add this recipe to the mix.  It's a little bit time consuming, but it's so much better than the jarred or (gasp!) canned version at your local grocery.  Skip the powdered crap and make it from scratch!!  Need the recipe for the best Super Bowl Sunday ever?!  Whip up your favorite dips, build some monster sandwiches, pour half a dozen bowls of chips, and keep the beer extra cold!

2 tablespoons olive oil
3 pounds onions, halved and thinly sliced
salt and pepper
1/4 cup red wine vinegar
1 tablespoon fresh thyme, chopped
8 ounces cream cheese, softened
1 cup sour cream
french fried onions and paprika, for garnish

Heat olive oil in a heavy-bottomed pan over medium-high heat.  Cook onions, stirring occasionally, until soft and golden brown, about 15 minutes.  Cover and reduce heat to low.  Cook, stirring occasionally, until caramelized, about 40 minutes.

Raise heat to medium and season onions with salt.  Stir in vinegar and simmer until absorbed.  Stir in thyme and remove from heat.  Let cool.  Coarsely chop the onions.

With an electric mixer on medium speed, beat cream cheese until smooth.  Fold in sour cream and chopped onion mixture.  Season with salt and pepper.  Transfer to serving bowl, cover with plastic wrap, and chill 1 hour (or up to overnight) before serving.  Garnish with fried onions and paprika.  Serve with chips, crackers, and fresh veggies for dipping.

Recipe adapted from Martha's American Food, by Martha Stewart.

Monday, January 25, 2016

Individual Southwestern Chicken Pies

The holidays are over and my work schedule seems to be insane, even though I still work the same three shifts per week I always did.  Either way, cold weather is setting in and I feel the need to stock my freezer with precooked meals so the men in my life can eat well-balanced suppers when I'm not home in the evenings.  These chicken pies are adorable (I mean, who doesn't like food that looks like a cupcake), freeze well, transport well, and pack loads of veggies into one portion!  What more could you ask for?  Oh wait!  They're the perfect marriage between chicken pot pie and a loaded burrito...two family favorites at my house!  I just know you'll enjoy them as much as we do!

For the filling:
1/2 cup red onion, diced
1/2 cup red bell pepper, diced
1/2 cup frozen corn kernels
1/2 cup black beans, drained and rinsed
1 tablespoon fresh garlic, minced
1 teaspoon ground cumin
1 teaspoon minced cilantro
1 tablespoon vegetable oil
1 1/2 cups chicken stock
1/2 cup sour cream
2 tablespoons flour
8 ounces cooked chicken, shredded
1 1/2 cups shredded pepper jack cheese, divided
1 tablespoon lime juice
salt and pepper to taste

For the crust:
3/4 cup flour
2/3 cup cornmeal
1 tablespoon minced jalapeno
1 1/2 teaspoon baking powder
1/2 teaspoon salt
zest of 1 lime
1 cup milk
1 egg
1/4 cup vegetable oil
salsa

Preheat oven to 425 with a 6-cup jumbo muffin pan inside.

For the filling, sweat onion, bell pepper, corn, beans, garlic, cumin, and cilantro in 1 tablespoon oil in a large saute pan over medium heat, about 5 minutes.  Combine the stock and sour cream.  Whisk 2 tablespoons flour into the vegetable mixture to coat, then whisk in the sour cream mixture and cook until slightly thickened, about 5 minutes.  Stir in chicken, 1 cup of the cheese, and lime juice.  Season with salt and pepper to taste.

For the crust, whisk 3/4 cup flour, cornmeal, jalapeno, baking powder, 1/2 teaspoon salt, and zest in a bowl.  Stir in milk, egg, and 1/4 cup oil and combine well.

Scoop 1/3 cup cornmeal batter into each well of the hot pan.  Bake 5 minutes.  Scoop 1/2 cup filling into center of cornbread in each well and bake 20 minutes more.  Sprinkle remaining cheese evenly over pies and bake until melted, about 5 minutes.  Let pies stand 5 minutes, then run a knife along the edges to release and serve with salsa on the side.

Serves 6.

Recipe adapted from Cuisine at Home, March/April 2014.

Monday, December 28, 2015

Colonial Christmas Pomanders

I'm from Southeastern Virginia, right down the road from Colonial Williamsburg.  Naturally, I'm drawn to the classic styles of the area (and era), and that doesn't disclude Christmas decorations!  For out final holiday craft this season, allow me to introduce pomanders to you!  Traditionally a Christmas air freshener, as well as a way to ward off disease, a pomander is made from a piece of fruit (usually citrus) and whole cloves.  Once dried, the natural air freshener will last for years!

citrus fruit, such as oranges, lemons, grapefruit
whole cloves

Simply place the whole cloves into the flesh of the fruit in any pattern you'd like.  Allow the fruit to dry for several days, letting the natural oils and fragrances perfume your home!  If you'd like, tie a sturdy ribbon around the fruit and hang from a window or chandelier.  Use the pomanders in drawers, cupboards, or as part of your seasonal decor (or year round!).  Enjoy the scents of the season!

Monday, December 21, 2015

Cinnamon Hot Cocoa Mix

I've been itching to publish this post for a while now, but these are my boys' Christmas gifts for their teachers this year, and, since a couple of the teachers are Facebook friends of mine and my blog publishes to my Facebook page, I had to wait.  Well, the class Christmas parties were Friday, so now I'm safe!  My grandmother made a version of this cocoa mix and sent it to my mom in college care packages.  And then my mom did the same for me.  She and her friends would also put together packages of cocoa mix for various Wives Club craft fairs during my dad's Marine Corps career.  It's the best hot cocoa you can imagine, and this recipe makes a ton, so you don't need to worry about running out!

1 25-ounce box non-fat dry milk (like Carnation)
1 18-ounce jar coffee creamer (Coffee Mate)
1 16-ounce box powdered chocolate drink mix (Nestles Quick)
1 heaping cup powdered sugar
1/3 cup ground cinnamon
1/3 - 1/2 cup unsweetened cocoa powder

Combine all ingredients in a huge mixing bowl.  Ensure thoroughly combined and all ingredients equally distributed.  

To make a cup of hot cocoa, boil 1 cup of water and stir in 1/3 cup of dry mix.  Stir well.  Add a splash of vanilla and a dollop of whipped cream to make it extra special!

Giving your cocoa mix as a gift?  Here are some ideas for packaging:
-Zip-lock bag of cocoa mix placed inside a decorated brown paper lunch bag
-Mason jar with pretty ribbon
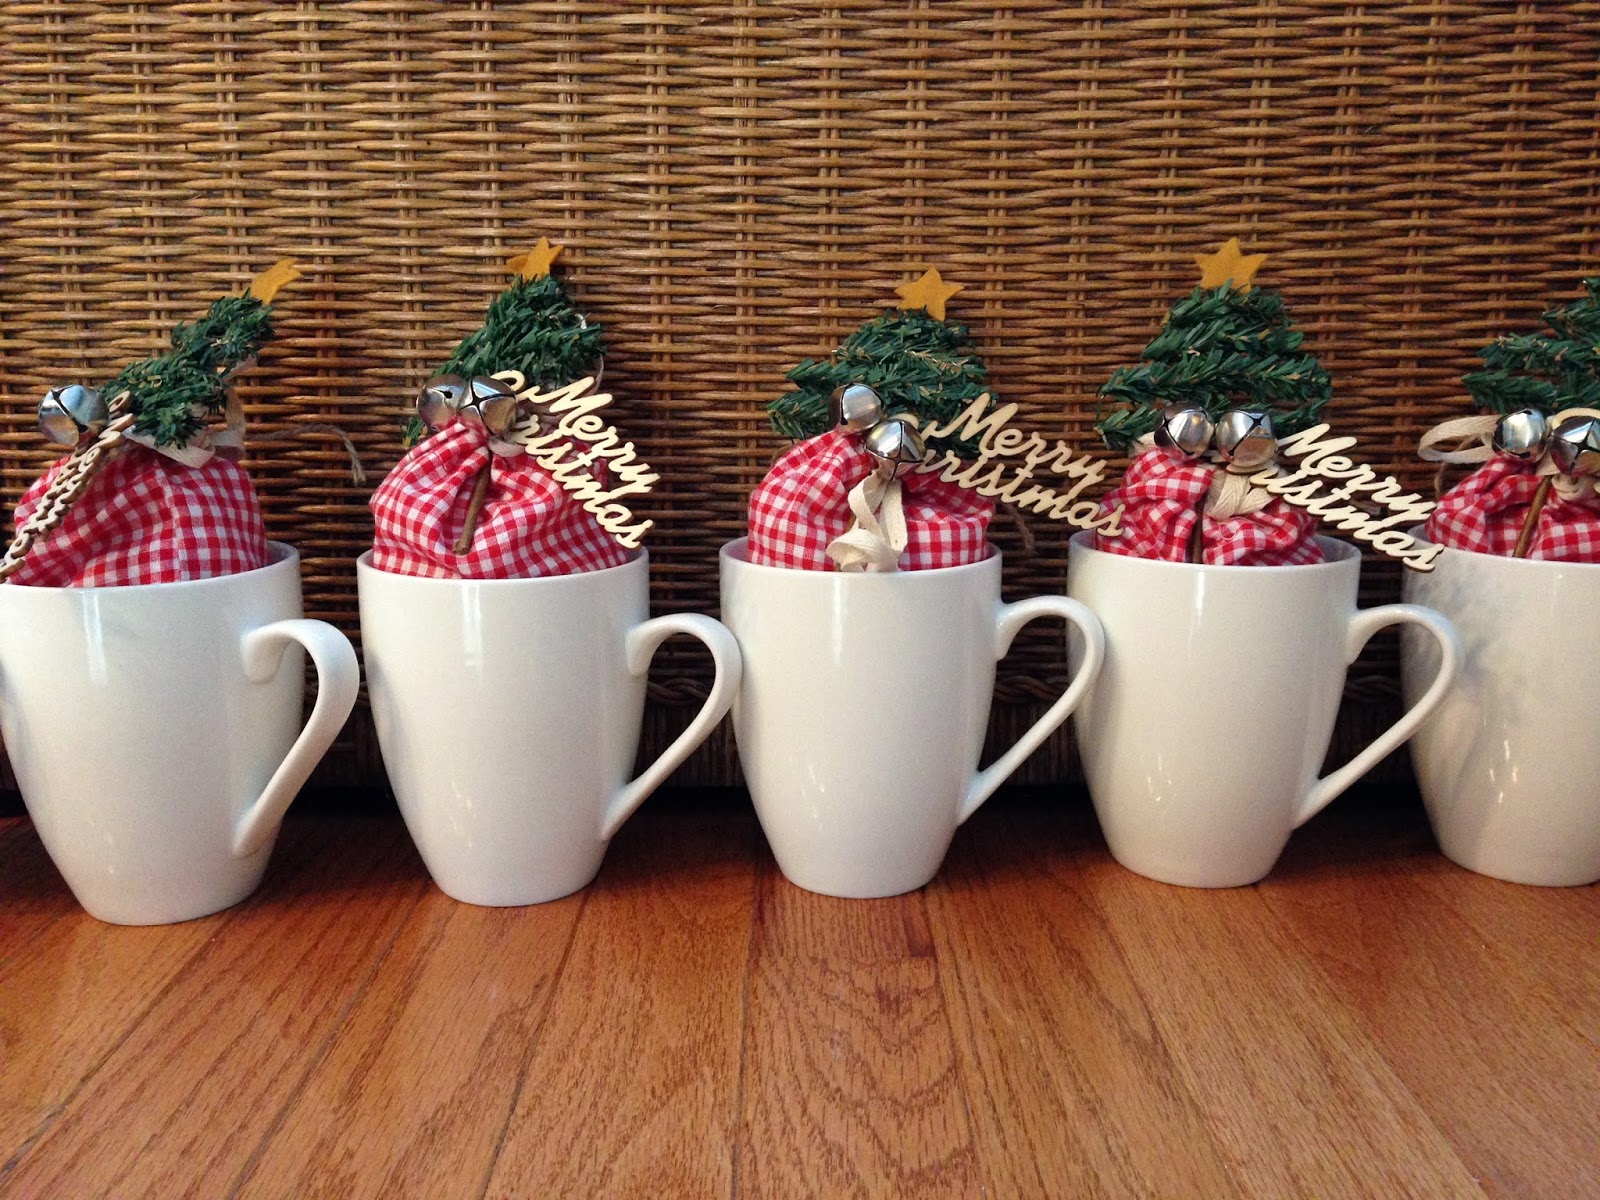
-Like I did it below:  I placed a single serving (1/3 cup) of the mix into a clear cello bag.  Place a few of the single serve bags into a larger gingham sack, along with instructions on how to make hot chocolate.  Tie up the sack with a Christmas tag or jingle bells, and place the sack into a mug!


Monday, November 9, 2015

Half-time Hoagie

Sandwiches are the quintessential football food. And, when you're hosting a bunch of dudes for the biggest game of the year, it's crucial to serve dishes that can feed an army! Enter this sandwich. It's piled high with meat. It has a kick of heat from the peppers. It has the perfect crunch from the toasted bread. And it can be switched up to suit the tastes of your entire party. Serve it on a large cutting board and let your guests cut off their own.  Bonus, it even keeps in the fridge for a day or two without getting too soggy, thanks to the toasted bread!

3 tablespoons butter
3 cloves garlic, minced
1 tablespoon parsley
1 loaf ciabatta, halved length-wise
1/3 cup mayonnaise
1/2 pound thinly sliced deli turkey
1/2 pound thinly sliced deli ham
1/4 pound thinly sliced salami
1/4 pound thinly sliced provolone
salt and freshly ground black pepper
1 cup shredded lettuce
1/4 cup sliced hot banana peppers, drained
1/4 cup thinly sliced red onion

Preheat the broiler.

In a small skillet over low heat, melt the butter with the garlic. Continue to cook over low heat until the garlic begins to soften, 2-3 minutes. Add the parsley and cook another minute. Remove from heat and spread on the inside of both pieces of ciabatta. Place under the broiler and toast until golden. Let cool.

Spread the mayonnaise on the bread. Layer the turkey, ham, salami, and provolone on the bottom half of the bread. Sprinkle with salt and pepper. Top with lettuce, peppers, and onion. Cover with top half of bread. Wrap tightly in foil and place a heavy skillet (I used a cast iron griddle pan) on top. Let sit 30 minutes.

Slice and serve.

Monday, November 2, 2015

Quarterback Queso Dip

It's not Game Day without some sort of warm dip, oozing over crispy tortilla chips.  My family is a big fan of the classic Rotel & Velveeta combination, but this year I wanted to do something a little different.  I combined a few of my favorite flavor combinations, pulled from a few tried and true cheese dips and queso recipes, and stirred it all together in a cast iron skillet to add just a touch more pizzaz.  The result was this dip, which was declared a winner, no matter which team my guests were rooting for!

1 pound ground beef
2-3 cloves garlic, minced
1 packet taco seasoning
1 16-ounce jar of chunky salsa
2 cups shredded cheddar cheese
8 ounces cream cheese, cut into cubes
1 can black beans, drained and rinsed

In a medium skillet (I like cast iron) over medium heat, brown the beef along with the garlic.  You may need to add some olive oil, depending on the leanness of the meat.  Add the taco seasoning and salsa, bringing to a simmer.  Cook uncovered for 10 minutes, stirring occasionally.  Drop the heat to low and add the cheese, cream cheese, and beans.  Cook until just melted.  Serve hot with tortilla chips

Monday, October 12, 2015

German Potato Salad (Warm)

About four years ago, my husband and I bought a Groupon deal to attend an Oktoberfest celebration in Carmel Valley, CA.  Tickets included drinks and a meal, live music, and plenty of entertainment.  We were not disappointed.  Especially with the food!  I might have tasted authentic German potato salad in the past (I've been to Germany several times, and my grandmother was German, so I'm sure there's a family recipe floating around somewhere, but this isn't it...) but I don't remember ever eating it.  Until that day in California.  The potatoes were perfectly soft, and the dish was just the right amount of sweet and salty, with a little crunch from the bacon, and even pretty (dare I say that about potato salad, which is usually just a tan blob on a plate?) to look at.  When I came across this recipe, I knew I had to tweak it and try it!  Once again, I wasn't disappointed, and I know you won't be either!

3 cups diced peeled potatoes
4 slices bacon
1 small onion, diced
1/4 cup white vinegar
2 tablespoons water
3 tablespoons white sugar
1 teaspoon salt
1/8 teaspoon ground black pepper
1 tablespoon chopped fresh parsley, plus more for garnish

Place the potatoes into a pot, and fill with enough water to cover.  Bring to a boil, and cook for 10 minutes, or until easily pierced with a fork.  Drain, and allow to cool.

Chop bacon into small pieces and fry in a large deep skillet over medium-high heat, until browned and crisp, turning as needed.  Remove from the pan and set aside.  Add onion to the bacon grease, and cook over medium heat until browned.  Add the vinegar, water, sugar, salt and pepper to the pan.  Bring to a boil, then add the potatoes and parsley.  Crumble in half of the bacon.  Heat through, then transfer to a serving dish.  Crumble the remaining bacon over the top, garnish with additional parsley, and serve warm.

Serves 4-6.

Monday, October 5, 2015

Bavarian Pretzels

One of my favorite after-school snacks as a kid was a warm pretzel dipped in mustard.  Even as an adult, I love to stop at the mall pretzel place, or at a food kart at the amusement park, and get a giant pretzel to share with my kids.  Several years ago, when I attended an Oktoberfest celebration with my husband and then four-month old, I couldn't wait for a warm, just slightly salted pretzel, slightly crispy on the outside and light and fluffy on the inside.  When I decided to plan an Oktoberfest-themed meal this year, I knew this carb bomb was a must!  Enjoy...I know I will!

3 cups all-purpose flour, divided
1 tablespoon active dry yeast
1 teaspoon white sugar
2 tablespoons butter, softened
1 1/3 cups water
1/4 teaspoon salt
3 tablespoons baking soda
3 cups water
2 tablespoons butter, melted
1 tablespoon coarse sea salt, or to taste

In a stand mixer fitted with the dough hook, stir together 1 cup of flour, yeast, sugar, 2 tablespoons of butter, and 1 1/3 cup water.  Let this mixture stand until bubble begin to form, about 15 minutes.  Stir in the salt and gradually stir in the remaining flour until dough is smooth and elastic, about 5 minutes, adding more flour if needed.

Divide the dough into 6 pieces and let them rest for a few minutes.  Roll out one piece at a time into a rope about 15 inches long.  Loop and twist into that cool pretzel shape.  Set on a baking sheet while you roll out the remaining portions.

Preheat the oven to 450 degrees F.  Bring the remaining 3 cups of water to a boil and add the baking soda.  Remove from the heat.  Dip pretzels into the water bath for about 45 seconds, flipping over about halfway through.  Place the soaked pretzels on a greased baking sheet and brush with melted butter, then sprinkle with coarse salt.

Bake until golden brown, 8 to 10 minutes.

Serve warm, with your favorite mustard for dipping!

Monday, August 24, 2015

Artisan Bread

When I was a baby, my mama made all her own bread.  Later, when I was a teenager, she used a bread machine, and I remember the wonderful smell of homemade bread baking throughout the house.  I've only ever made beer bread and banana bread, and, while I have no plans to make 100% of my family's bread from scratch, it's nice to make every now and then.  Especially when you're making a pot of mussels and have an amazing pot of cooking juices in which to dip torn off bites of crusty-on-the-outside-and-chewy-on-the-inside homemade bread!  This recipe is super easy, pretty fast (for bread), and incredibly tasty!  I hope you'll enjoy it as much as me!

2 cups all-purpose flour
1 cup bread flour
2 teaspoons salt
1/2 teaspoon active dry yeast
1 1/2 cups warm water

In a stand mixer fitted with the dough hook, stir together the flour, salt and yeast. Add water, mixing on slow speed until the mixture forms a shaggy but cohesive dough. Do not over-work the dough. 

Cover bowl with plastic wrap and let sit at room temperature for 8-24 hours, until it bubbles up and doubles in size.

After dough is ready, preheat oven to 450 degrees.  Place a Dutch oven, uncovered, into the preheated oven for 30 minutes.

While the Dutch oven preheats, turn dough onto a well-floured surface.  With floured hands, form the dough into a ball.  Cover dough loosely with plastic wrap and let rest.

One the oven is preheated, remove the Dutch oven and, with floured hands, place the dough into it.Cover and bake for 30 minutes.  Carefully remove cover and bake for 7-15 minutes more, uncovered.

Monday, June 22, 2015

Peanut Butter Bars with Chocolate Ganache

Everyone loves dessert and these rich chocolatey bars are no different.  First of all, they boast my personal favorite flavor combo of peanut butter and chocolate.  Secondly, they're wonderfully decadent whether served at room temperature, chilled, or slightly warmed with a big glass of cold milk.  They're easy to put together and even easier to pack up, making them the perfect "non brownie" dessert to complete a meal for a neighbor in need...or maybe your husband who claims the whole tray so he can have treats at the office all week!

1 1/4 cups creamy peanut butter
1 stick butter, softened
1 cup packed brown sugar
1/2 cup syrup
2 eggs
1 tablespoon vanilla
2 cups flour
1 teaspoon baking powder
1 teaspoon salt
3/4 cup heavy cream
12 ounces milk chocolate chips
1/4 cup dry-roasted peanuts, chopped

Preheat oven to 350.  Coat a 9x13-inch baking pan with nonstick spray.

Cream peanut butter, butter, and brown sugar in a mixer until light and fluffy.  Add syrup, eggs, and vanilla and beat until combined.  Add flour, baking powder, and salt, mixing until just combined.  Spread batter into prepared pan.

Bake bars until a toothpick inserted in the center comes out clean, 25-30 minutes.  Let cool completely, about 1 hour, before topping.

To make the ganache topping, heat cream in a small saucepan over medium heat until steaming.  Add chocolate chips and whisk until smooth.  Remove from heat and pour over bars.  Sprinkle with chopped peanuts.  Let ganache set up for about an hour before cutting into bars.

To make it travel-ready:  Simply bake these yummy bars in a foil pan.  No muss, no fuss!

Monday, June 8, 2015

Chicken Tetrazzini

This is a classic casserole that everyone's mama's mama has been making since the dawn of time.  It's easy to throw together for a weeknight supper, can be made in advance, freezes (and travels) well, and can be doubled, tripled, or halved to feed whatever size army you have around your table!  Another little bonus I've learned about casseroles?  They may not be the prettiest, especially in photographs, but because they usually involve cheese, you can sneak in tons of veggies for those picky toddlers in your life.  Believe me.  I know!  Oh, and this is even better the next day...hello leftovers!

2 sticks butter
4 chicken bouillon cubes
1 large onion, chopped
1 cup finely chopped celery
1 1/2 cups sliced mushrooms
3 cups chicken stock
12 ounces Velveeta cheese, cut into cubes
2 cups bite-sized pieces cooked chicken (I poach 2 or 3 boneless skinless breasts)
12 ounces vermicelli, or other long noodle
grated parmesan for sprinkling
 paprika for sprinkling

Melt the butter over low heat in a large saucepan.  Add the bouillon and mash into the melted butter.  Add the onion, celery, and mushrooms.  Saute until vegetables are light brown.  Add 2 cups of the stock and the Velveeta.  Cook until the cheese is melted.  Stir in the chicken.  Remove from heat.

Preheat the oven to 300.  Cook the pasta until just al dente; drain.  Add the chicken mixture and 1/2 cup of the remaining stock and mix well.  Spoon into a greased 9x13-inch baking dish.  Sprinkle with parmesan and paprika.  Bake 10 minutes.  Pour the last 1/2 cup stock over the top and bake an additional 10 minutes or until bubbly.

Serves 8.

To make it travel-ready:  Bake the casserole in a foil disposable baking dish with a plastic lid.  This way, you can easily write the reheating instructions on the lid with a permanent marker...or tape a note to the top of the pan too.  Your neighbor will appreciate that she doesn't need to wash and return your bakeware, so she can save the meal for later if she's already stocked from other well-meaning friends.

Recipe adapted from My Mama Made That, by the Junior League of Hampton Roads.

Monday, April 20, 2015

Lemon-Poppyseed Scones

Living in England as a teenager, I came to love scones at an early age.  Fresh from the oven with a piping hot cup of herbal tea is such a special treat and comfort to me.  That said, I've always been wary of pastries and things that involve skills like cutting in butter or pulsing to just the right consistency.  Typically my Easter scones are store-bought.  Well, not this year!  This year I found a recipe that promised to be fool-proof and delicious and I was determined to make my own.  I'm so glad I did, because these were well worth the effort and there are plenty of leftovers for my teatime treats later this week!

3 cups all purpose flour
1 cup plus 1 tablespoon sugar
3 tablespoons poppy seeds
1 tablespoon baking powder
2 teaspoons grated lemon peel
1 teaspoon salt
10 tablespoons (1 1/4 sticks) chilled unsalted butter, cut into small pieces
1 large egg
2 tablespoons fresh lemon juice
1/3 cup (or more) whole milk

Preheat oven to 375°F. Position rack in top third of oven.  Mix flour, 1 cup sugar, poppy seeds, baking powder, lemon peel, and salt in processor.  Add butter and cut in, pulsing, until mixture resembles coarse meal. Whisk egg and lemon juice in medium bowl to blend. Add to flour mixture. Pulse until moist clumps form.  Add 1/3 cup milk. Pulse just until dough comes together, adding more milk if dough seems dry.  Using floured hands, gather dough into ball.  Flatten into 8-inch round.  Cut round into 8 wedges.  Transfer scones to large baking sheet; brush with milk.  Sprinkle with remaining 1 tablespoon sugar.

Bake until scones are golden brown and tester inserted into center comes out clean, about 25 minutes. Transfer to rack and cool. 

Can be made 1 day ahead. Store airtight at room temperature.  

Serve warm plain, buttered, or with fruit preserves (I'm a fan of raspberry!).

Monday, March 16, 2015

Colcannon

3 slices bacon
2 pounds russet potatoes, peeled and cut into chunks
1/4 cup milk, warmed
2 tablespoons butter
1/2 teaspoon salt
1/4 teaspoon ground black pepper
2 tablespoons minced fresh parsley

Place the bacon in a large, deep skillet, and cook over medium-high heat, turning occasionally, until evenly browned, about 10 minutes. Drain the bacon slices on a paper towel-lined plate. Crumble the bacon and set aside.

Place the potatoes into a large pot and cover with salted water. Bring to a boil, then reduce heat to medium-low, cover, and simmer until tender, about 20 minutes. Drain and allow to steam dry for a minute or two.

Place the potatoes into a large bowl, and add milk, butter, 1/2 teaspoon of salt, and 1/4 teaspoon of pepper. Mash the potatoes with an electric mixer until smooth and creamy. Stir in the crumbled bacon, and parsley until well combined.

Monday, February 23, 2015

Parmesan Steak Fries

I've tried making French fries before.  While tasty, they didn't have the right crispy-on-the-outside-soft-on-the-inside texture for my liking.  And, I'll be honest, when it comes to fries, I tend to prefer the smaller shoestring variety than large steakhouse styles.  Until I made these.  Not only are they super easy, but they're incredibly versatile.  There are endless ways to change the flavors and seasonings to fit just about any meal.  And let's face it, when you're serving a steak dinner, big wedges of potato are a whole lot more sophisticated than a side of fries!  Serve these with your favorite dipping sauce or a dollop of flavored butter....or eat them plain.  The world is your oyster; enjoy!

3 large egg whites
3 baking potatoes
1 cup grated parmesan cheese
salt to taste

Preheat oven to 425.  Line a baking sheet with parchment paper.

Whisk the egg whites into a shallow dish.  Wash the potatoes and cut each into 6 long spears.  Add to the egg whites and turn to coat.  Place the parmesan in a separate shallow dish.

One at a time, remove the potato spears from the egg whites, allowing the excess to drip off.  Roll the spear in the parmesan, coating each spear evenly on all sides.  Place on the parchment-lined baking sheet.

Bake, without turning, until the potatoes are fork-tender and golden brown, about 30 minutes.  Season with salt to taste.

Serves 4.

Recipe adapted from Great Food Fast by Martha Stewart Living.

Monday, December 29, 2014

Port Wine Cheese Ball

Who doesn't love a cheese ball?!  This is a favorite family appetizer in my family, the perfect precursor to a later meal or addition to the hors d'oeuvres table at a cocktail party.  This year, half of our out-of-town guests were arriving late Christmas evening, pushing our Christmas supper to well after the traditional dinner hour.  I had this cheese ball on hand to hold us over until everyone had arrived and all the gifts had been unwrapped.  It's equally wonderful for a game night snack or a gift to surprise neighbors or a favorite teacher!  Change up the cheese, dried fruit, herbs, and nuts to make the flavor your own!

1 cup tawny port
1 package cream cheese, softened
1 2-cup package shredded cheddar cheese
1/4 cup dried cherries, chopped
3 tablespoons minced fresh chives, divided
2 teaspoons tawny port
1/8 teaspoon ground nutmeg
salt and pepper to taste
3/4 cup chopped pecans

Boil 1 cup tawny port in a small saucepan until reduced to 2 tablespoons.

Combine cream cheese, shredded cheese, cherries, 1 tablespoon chives, remaining 2 teaspoons port, and nutmeg in a stand mixer fitted with the paddle attachment.  Season with salt and pepper.  Stir port syrup into cheese mixture just to swirl.  Roll into a ball.

Combine pecans and remaining chives and spread on a plate or in a shallow dish.  Roll cheese ball into mixture to coat evenly on all sides.  Wrap in plastic and chill until ready to serve.